
In this post, we are going to show how you can create WordPress application using BizCloud. Make sure you refer to our previous post How to Pay Digital Ocean with Bitcoin on how to create BizCloud account and top up your credit using Bitcoin and other cryptocurrencies. Once you have sufficient credit, we can start to install WordPress from BizCloud.io.
Step 1 — Login to your BizCloud.io account and go to your dashboard. You will be directed to Clouds page in your dashboard.
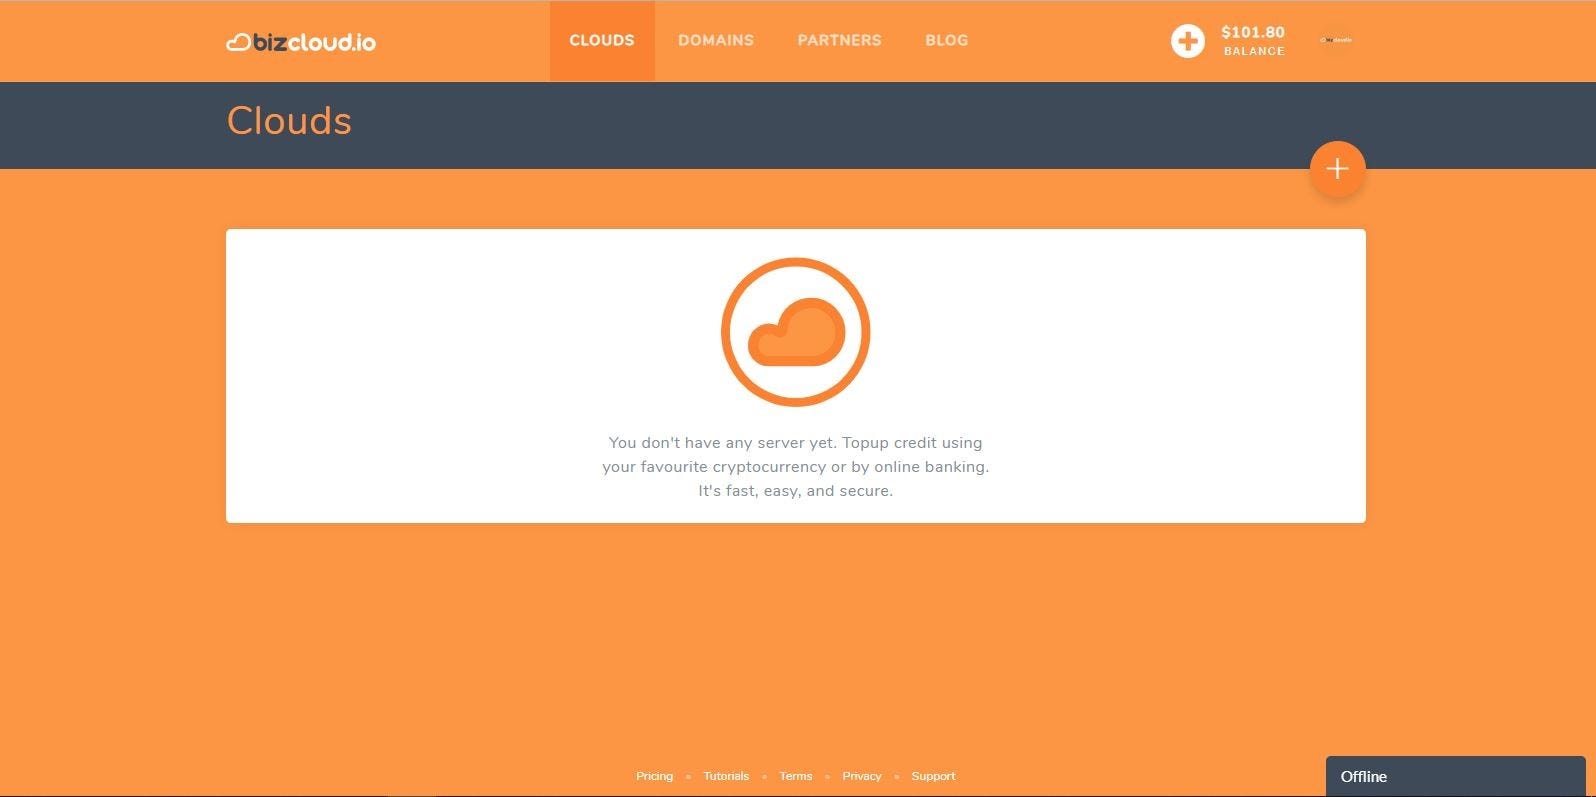
Step 2 — Click on the plus sign on the dashboard.
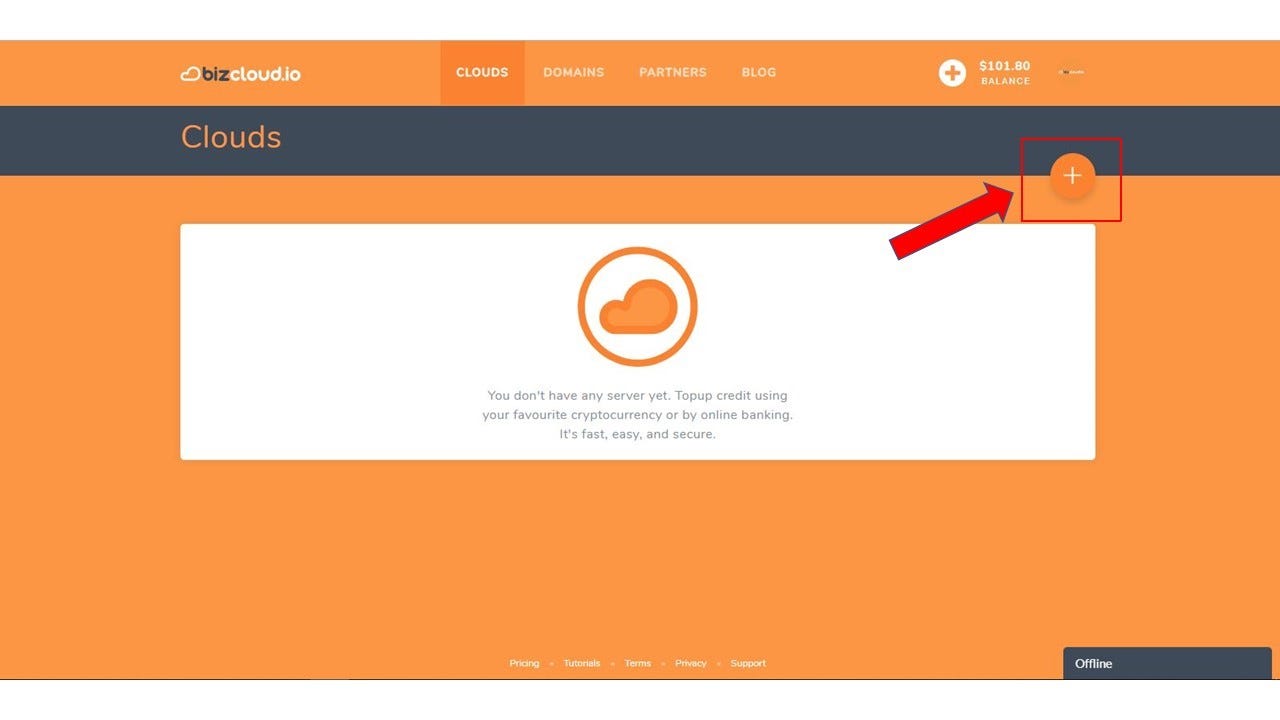
Step 3 — You will be directed to Create Cloud Page. Click on the One-Click Apps.
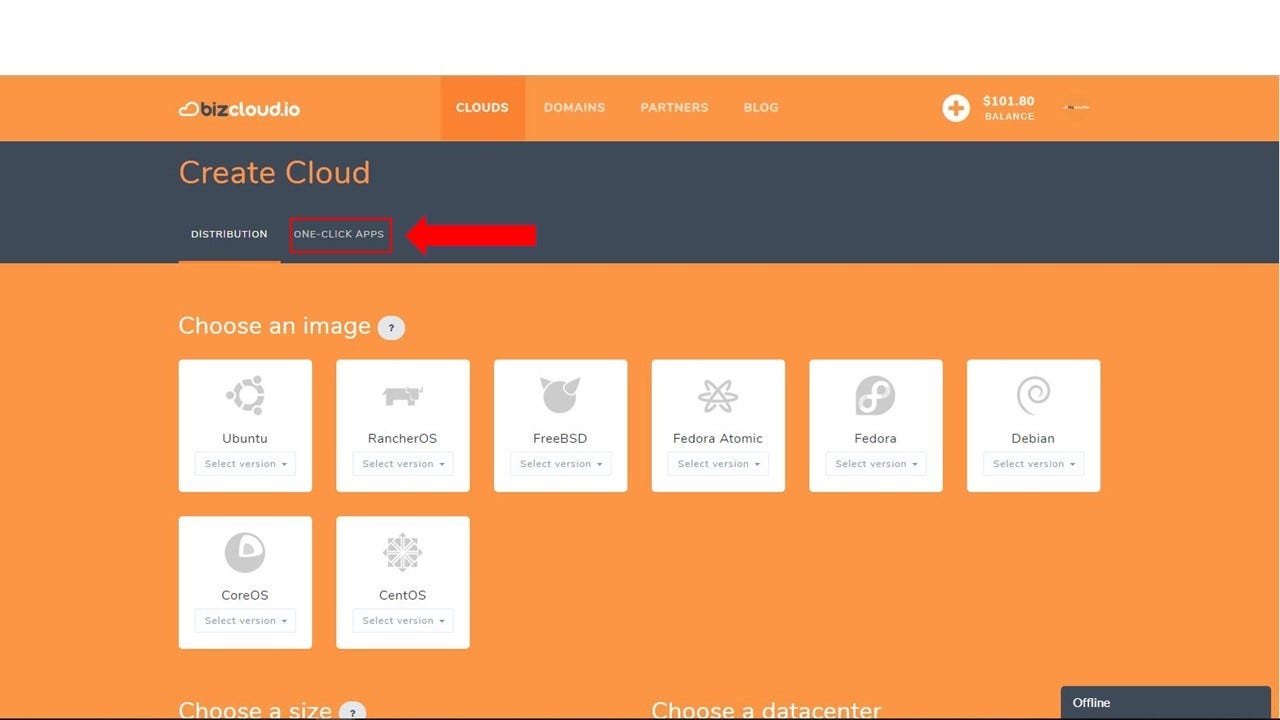
Step 4 — Now you will be redirected to One-Click Apps page.
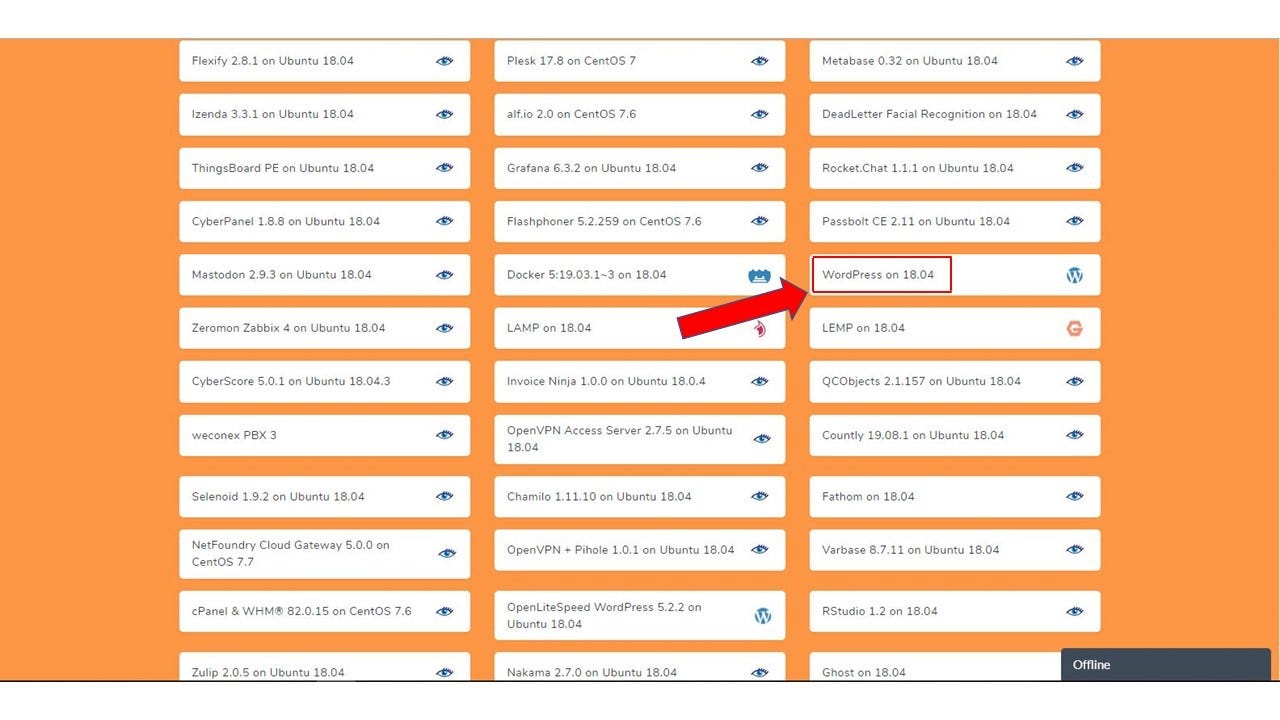
Step 5 — Search and click on “WordPress on 18.04”.
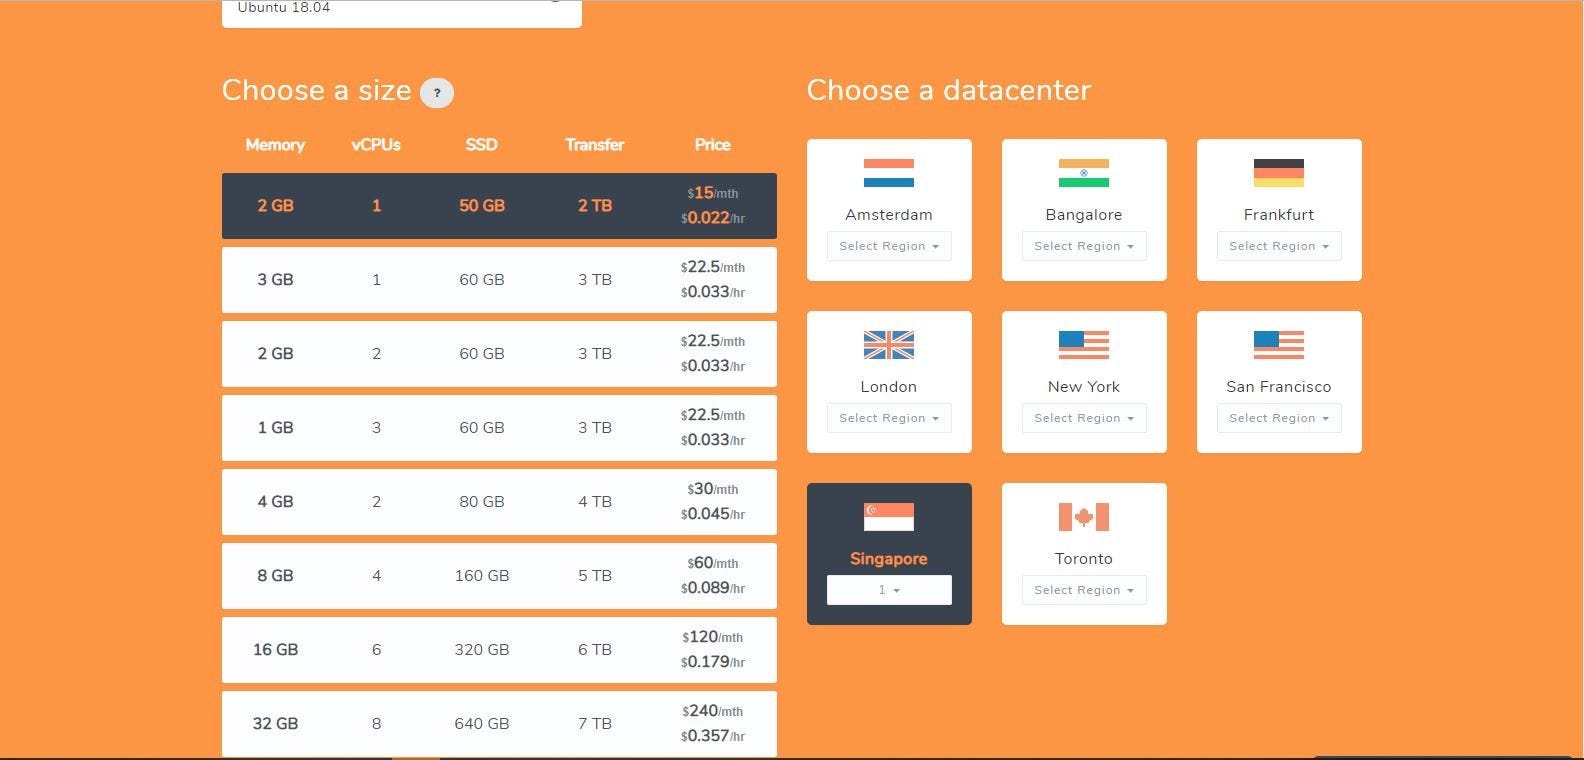
Step 6 — Scroll down and choose your WordPress application size and data center location.
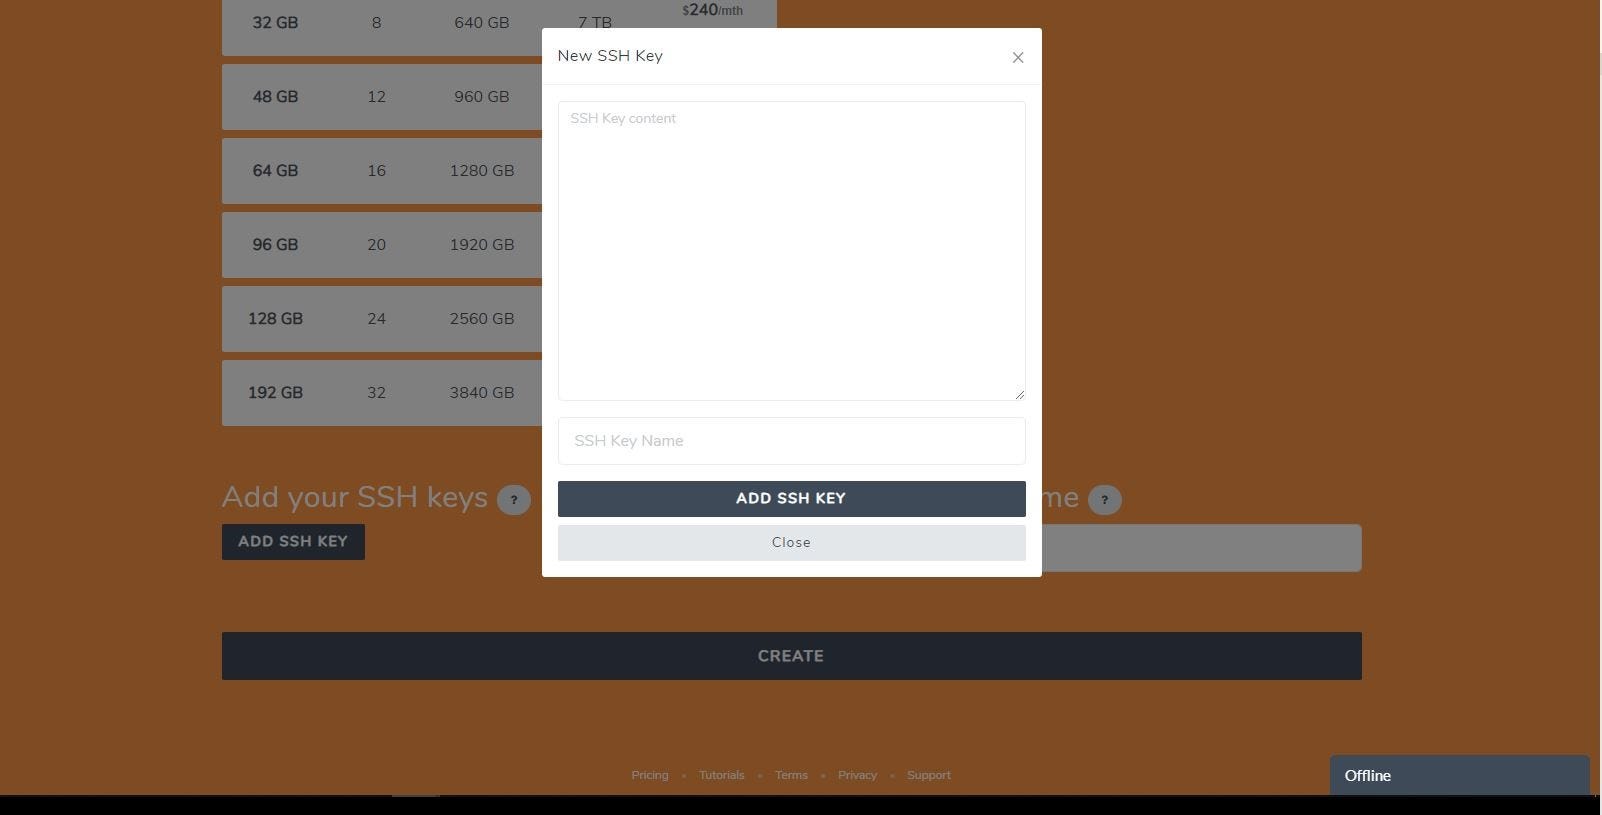
Step 7— Click Add SSH Key.

Step 8— Provide your SSH key, and give a name for your SSH key.
Step 9— Provide a name for your WordPress Application.
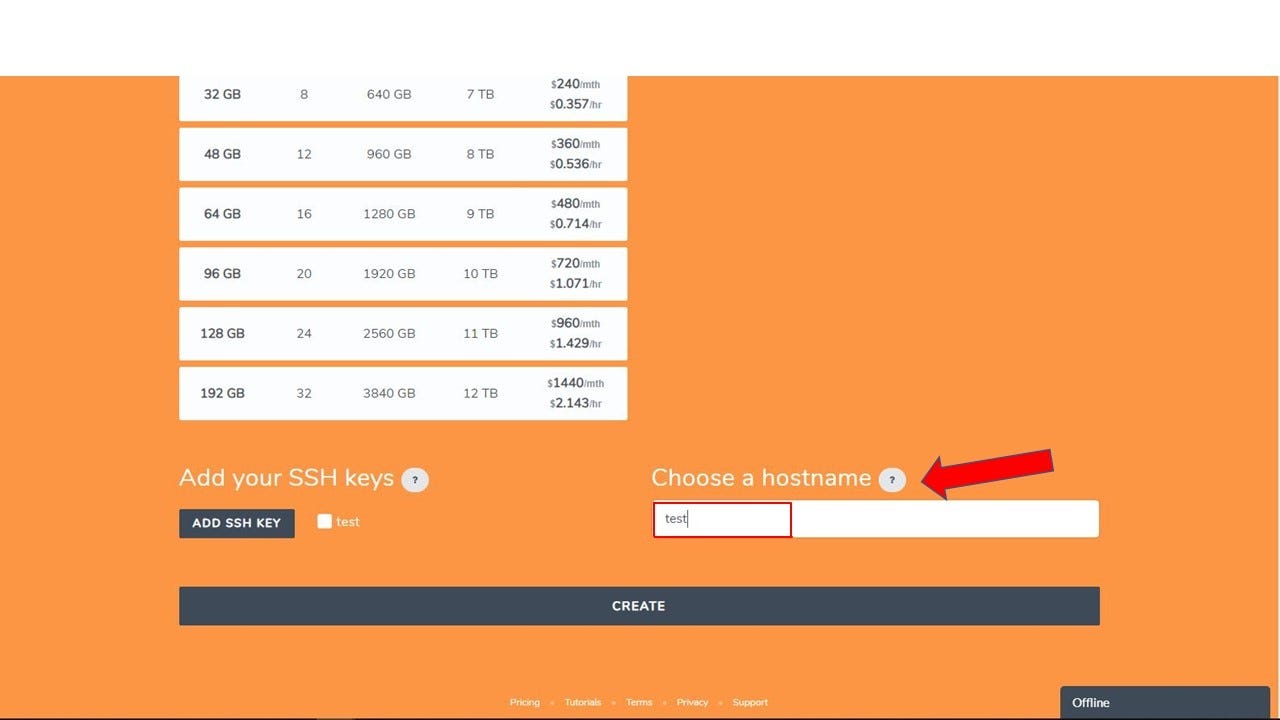
Step 10— Click Create.
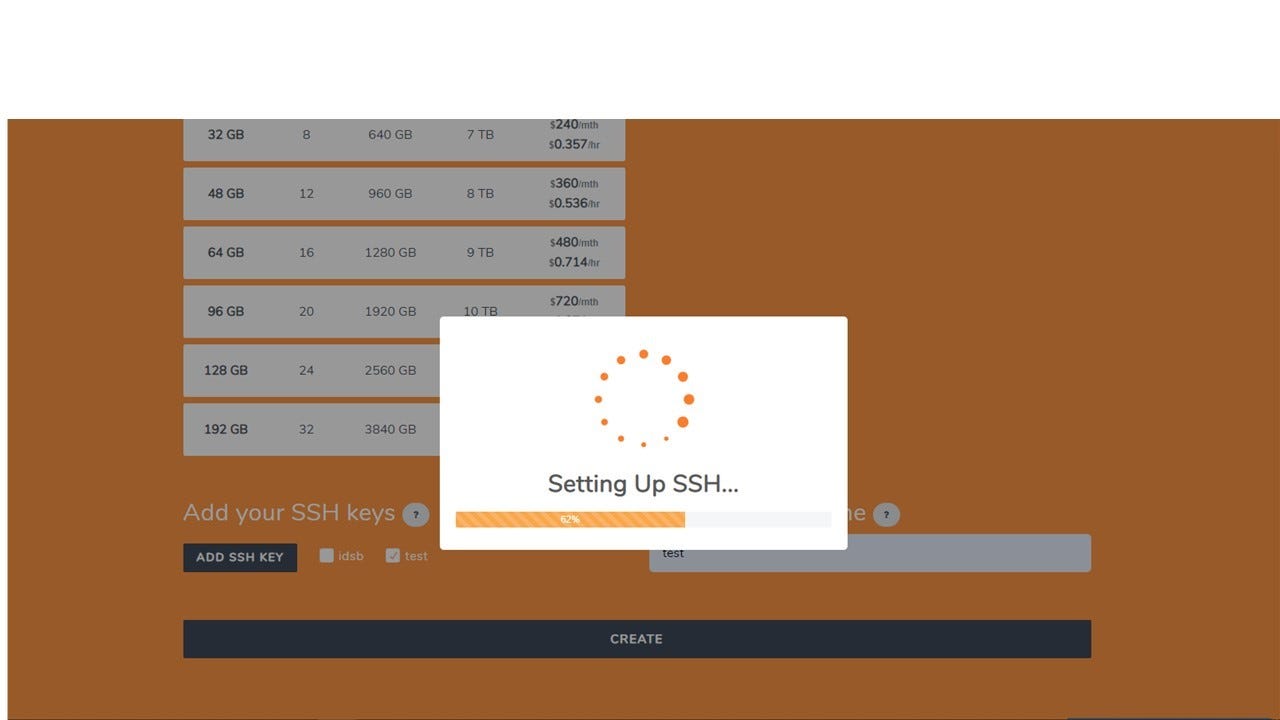
Step 11— Wait for BizCloud finish setting up your WordPress application.
Step 12 — You will be directed to your BizCloud Clouds page.

From here onward, you can connect to your WordPress applications using the IPv4 and IPv6 address and start setting up your WordPress configurations. Your cloud server will be deleted if your credit has $0 balance.
Now you have your own WordPress server, paid by using Bitcoin and cryptocurrency.
 Admin Istrator on Nov 5, 2019